x8086NetEmu, an 8086 emulator written in VB.NET
So, now that I had all the major components of the 8086 emulated I thought I should be able to test it against some simple and basic code.
I used many of the per-compiled binary programs offered by the EMU8086 project. These are very simple and basic programs that are quite useful to know whether the emulation is working correctly.
As you can imagine, at first, nothing worked and it took me quite some time to correct the emulation of several instructions.
Once every single sample from EMU8086 worked correctly, I moved to the next step: trying to run a BIOS.
Thanks to the (amazing) hard work of Ya`akov Milesand and Jon Petrosky we all have access, not only to a freely distributable BIOS, but to its source code.
Soon after attempting to run the BIOS’s code through the emulator (which didn’t work) I realized I needed some sort of feedback on what was going on. This is when I realized I’d need to work on a debugger for the emulator.
Working on my spare time, it probably took me 2 months to develop such a component; but it was worth it!
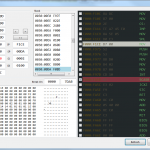
Here are some of the features of the debugger:
- Real-time display of Flags, Registers, Stack and Memory
- Real-time dis-assembly
- Breakpoints support
- Step-by-step execution (F8)
- Ability to enter expressions in the memory display (in the screenshot you can see the expression SI+10h which is translated into 0002h + 10h = 12h = 18)
All this, thank to the BinaryClass! - “Run” (f5) command to step through multiple instructions at a time
- Highlight (in red) the currently set active segment
- Ability to use “AS” in the segment section of the memory map address to point to the currently set active segment
- Ability to modify any flag and register value, real-time
- Ability to go back/forward in time (up to 255 sates, although the history size will be configurable in the future)
Thanks to this little wonder, I was quickly able to correct a gazzillion bugs in the emulated instructions allowing the emulator to, finally, bootstrap!
Here you can see the emulator running the BIOS’s memory check:
The Peripherals (aka The Chipset)
An 8086 emulator is supposed to be just that, an emulator that “simulates” the behavior of the 8086 chip… but, for the emulator to be of some use, it should also emulate the peripherals that were usually attached to the 8086 and allowed it to be a Personal Computer, instead of just a simple micro-processor.
The standard XT included several chips (ICs), besides the main CPU.
Each one of those chips provided a required functionality to make the whole product a machine that could be used for something productive. This symbiosis between these different ICs is what actually made the PC that we know today.
One of the most complex chips in the XT architecture was the 8259 and I assure you that, back in the day, I could have explained its inner-workings even better that the guy(s) who invented it.
Unfortunately, that is no longer the case.
So, instead of re-learning the way this complex chip works I decided to plagiarize the way it was implemented in another emulator: Retro 0.4
Retro’s code is written in Java so it took me some time to translate it to VB but, eventually, I did it.
And, not only I copied their code for the 8259, but I did the same for all the chips they support in their emulator: 8259, 8254 and the 8255.
I also implemented their scheduling mechanism, which I really like (the code and implementation is just beautiful) but I have my doubts whether it works correctly.


Recent Comments